

Dairy and Gluten Free Old Fashioned Strawberry Ice Cream
I finally took a leap of faith and tweaked my Old Fashioned Homemade Ice Cream for the Dairy Sensitive Person. Several of my dear friends are allergic to all or one of these ingredients: milk, nuts, corn, and/or gluten. I mean an anaphylaxis response; their throat swells up. I passed the test! My sweet friend who is very allergic to milk enjoyed my dairy and gluten free old fashioned strawberry ice cream with no reaction. We all savored the creamy texture with just the right amount of strawberry sweetness.
If you prefer a different flavor, choose your favorite frozen fruit to replace the strawberries in this recipe. Can you omit frozen fruit to make plain vanilla or chocolate ice cream? That is another recipe for another day.
Why Should You Make Dairy and Gluten Free Strawberry Ice Cream?
Save Money
Today, finding money in your budget is becoming a necessity. Finding it in your grocery budget without eliminating a treat is a win-win. Especially, when that treat is dairy and gluten free old fashion strawberry ice cream.
Does the thought of an hour in the kitchen make you reach for store-bought ice cream? Perhaps the extra cash savings I share will encourage you.
FACTS
When you shop, dairy free ice cream is found in a pint container. Sometimes, I almost eat the whole container in one sitting. Yikes!
A 4-quart homemade ice cream container equals 8 pints of ice cream!
The prices below reflect August of 2022, summer store-bought ice cream prices. Walmart continues to beat the competition with the most affordable prices.
- Ben & Jerry Ice Cream ranges from $3.98 to $6 dollars per pint (that is between $32 and $48 dollars for a gallon!)
- Planet Oat Ice Cream costs $5 per pint ($40 a gallon)
- So Delicious Dairy Free Ice Cream costs $7 per pint ($56 dollars a gallon)
Save Your Money!
With a bit of time and effort, you can make delicious homemade dairy free ice cream for a fraction of the cost. To save the most money, I make homemade dairy and gluten free sweetened condensed milk. I think of my time as paying myself. After deducting the cost of ingredients, I made about $25.00 dollars.
Motivation to Make it Yourself
When you make dairy and gluten free ice cream, you save money and expand your dessert menu. While shopping for store-bought ice cream, I must avoid any ice cream flavor with gluten-based ingredients: cookies, graham crackers, brownies, pretzels, etc. When you make your own dairy and gluten free ice cream, the mix-in choices are endless. You, loved ones, and friends can enjoy an endless variety of gluten free baked goods, toppings, and flavors: banana splits, ice cream sundaes, blizzards, and milkshakes.
My Motivation: Socials & Memories
I never make old fashioned homemade ice cream alone. My husband and kids enjoy the churning process leaving me free to clean up the kitchen. Curiosity brings everyone into the kitchen asking, Is it ready? When are they coming? Of course, I ask for help knowing that someday I will be in their kitchen asking, Is it ready? What flavor?
Ingredients for Old Fashion Homemade Strawberry Ice Cream
- One batch of COLD, homemade, dairy and gluten free sweetened condensed milk OR two cans of store-bought dairy free sweetened condensed milk
- 2 cans of COLD coconut milk
- 2 to 3 cups of frozen strawberries (or frozen fruit of your choice)
- 1/4 teaspoon of salt
- 1/4 cup of lemon juice
- Roughly 1 1/2 bags, 7 pounds each, of ice depending on your ice cream maker’s capacity
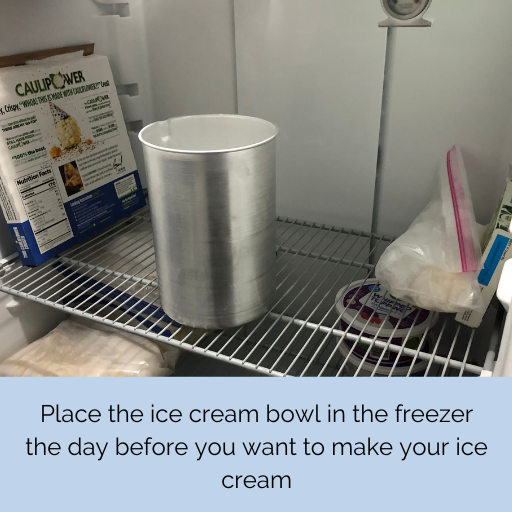
- Or, a frozen ice cream churning bowl (pre-freeze the ice cream churner bowl for at least 12 hours)
Ingredients for Homemade Sweetened Condensed Milk
- 2 cans of coconut milk
- 1 1/2 cups of sugar
- 1/2 Tablespoon of vanilla extract
- 1/4 cup of coconut milk
- 1 Tablespoon of organic plant based protein
- 2 Tablespoons of Cream of Tartar
- 2 Tablespoons of Benefiber (helps stabilize blood sugar)
- 1 Tablespoon of coconut flour
How to Make Dairy and Gluten Free Old Fashioned Strawberry Ice Cream
Before You Start
First, put your ice cream metal container in the freezer at least 2 or more hours before you make your ice cream or the day before.
Homemade Sweetened Condensed Milk
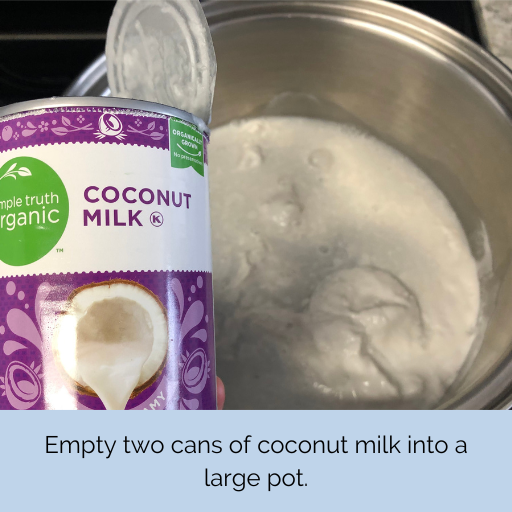
Empty two cans of coconut milk into a large pot.
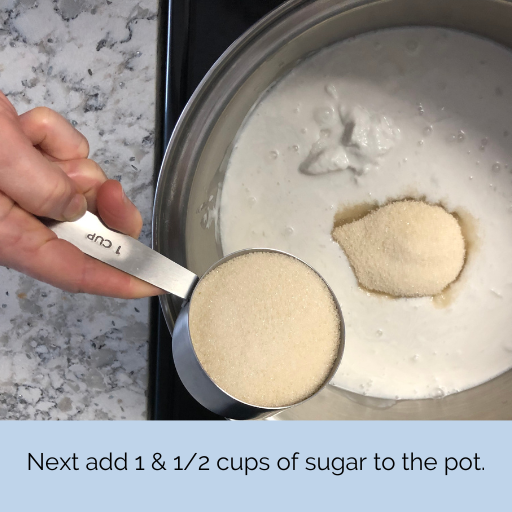
Next, add 1 & 1/2 cups of sugar to the pot.

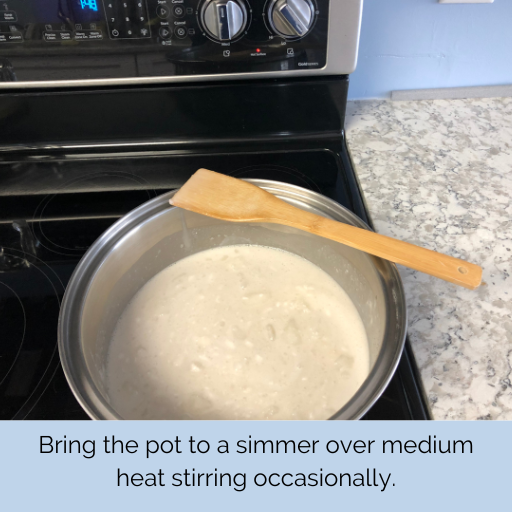
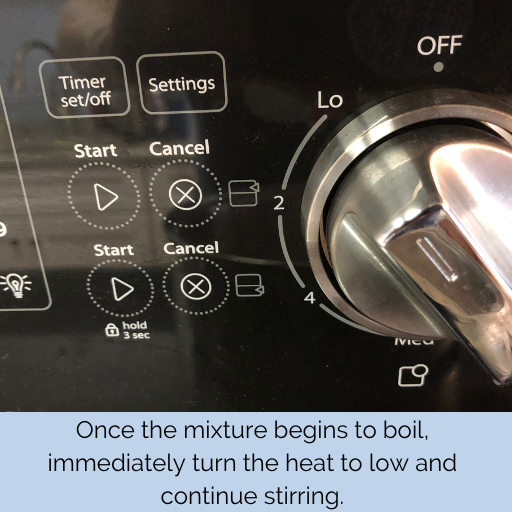
Bring the pot to a simmer over medium heat stirring occasionally.
Once the mixture begins to boil, immediately turn the heat down to low.
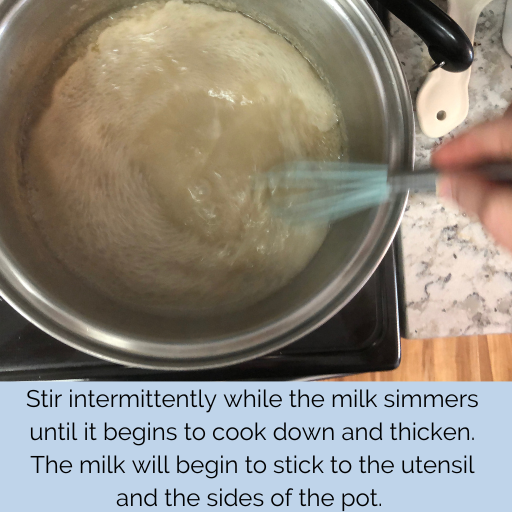
Allow it to continue simmering on the stovetop for one hour stirring every 5 to 10 minutes. As the milk cooks down and thickens, you will see the milk mixture look less foamy. It will also begin to stick to the stirring utensil and the sides of the pot.

