Gluten and Dairy Free Pie Crust, Picture By Picture
This article may contain affiliate links. Learn more
Can You Make a Gluten and Dairy Free Pie Crust Ahead of Time?
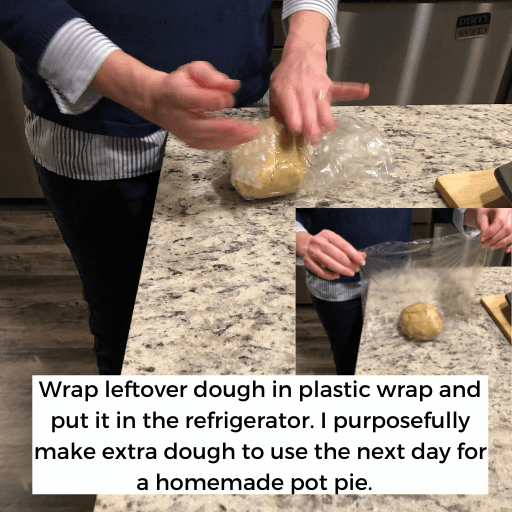
Yes! If you are getting ready for a baking weekend, then you can make your pie crust dough a few days early. First, roll the dough into two balls. Then, wrap it tightly in plastic wrap. Next, put the wrapped balls of dough into a ziplock bag. Make sure you remove as much air as possible from the ziplock bag. Lastly, store the dough in the refrigerator until you are ready to roll it out and bake.
Can You Freeze a Gluten and Dairy Free Pie Crust?
Yes! Whenever the holidays come around, I make a few gluten and dairy free pie crusts ahead of time to freeze. Use any type of metal, glass, or disposable pie pan. Place your pie crust in the pre-oiled pan. Then, cover the top of the pie crust with wax paper or parchment paper. If you are freezing one pie crust by itself, then place it in an airtight ziplock bag. You may also want to wrap the pie crust in plastic wrap. If you are freezing multiple pie crusts in pie pans, then you can nest them together with layers of wax paper in-between them. Place an empty pie pan on top. Then, plastic wrap the whole stack to make it air-tight. If you need to save space in your freezer, then freeze the dough in balls rather than in pie pans. Start by dividing the dough in half. One recipe makes two pie crusts. Then, shape the dough into balls, wrap them tightly in plastic wrap, and store them in an airtight ziplock bag in the freezer.Inspiration for Picture By Picture Directions
During my journey through sudden vision loss and recovery, I was surprised by how many daily tasks suddenly became more difficult. It was so strange to depend on another to read my recipes. Later, I read a post from someone recovering from a concussion. She shared how difficult it was to follow a recipe. I understood. Then, I had a light bulb moment! I could create recipes online that are visually friendly. Please share with others who need delicious dairy and gluten free recipes. Especially those experiencing vision that blurs; recovering from a concussion or brain injury; or who struggles to read.Free Holiday Ornament Hunt Activity
My free Holiday Ornament Hunt gives you a glimpse into our Moore Auditory Observation Activities Booklet and Visual Observation Activities Booklet. While playing if you observe any auditory or visual behavioral concerns, I encourage you to schedule a free 30 minute phone consultation. Learn how to more fully meet your loved one’s visual and auditory needs by completing a Moore Auditory-Visual Questionnaire and sharing your report with me.
Where to Find Millet and Oat Flour
One challenge to making this recipe is finding millet and oat flour at your local store. Oat flour is becoming easier to find. Bob’s Red Mill has a gluten free oat flour that you can purchase online or at your local grocery store. If you are unable to find oat flour, then you can put in a request at your grocery store’s customer service desk. Unfortunately, I have never found millet flour in any grocery store. However, you can find whole millet at grocery stores carrying gluten free products. If you buy millet grains, you need a coffee mill like the Cuisinart Supreme Coffee Mill or a grain mill like the Mockmill to grind millet grains into a fine flour. Another alternative is to purchase millet flour online. If you are not allergic to nuts, then Bob’s Red Mill Almond Flour is a great substitution. It is easy to find at grocery stores and creates high-protein baked goods that keep your blood sugar more stable. Once you open the almond flour, remember to store it in the freezer. If you want to grind your own grains, an electric grain mill will provide you with the most nutritious flour for your baking endeavors. If you plan to utilize fresh grains in your home on a regular basis, then a Mockmill Grain Mill is a wonderful investment. It mills the smallest grains like millet and also hard grains like oat groats and buckwheat. I was unable to grind millet in my Wonder Mill.Gluten and Dairy Free Pie Crust Ingredients
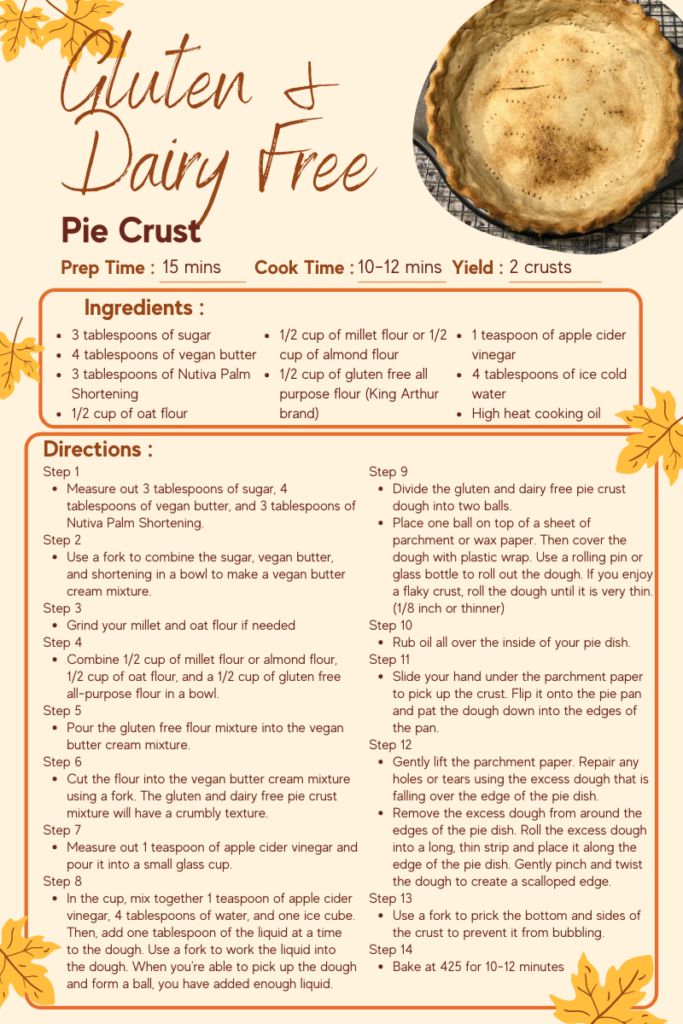
This recipe makes 2 pie crusts.- 3 tablespoons of sugar
- 4 tablespoons of vegan butter
- 3 tablespoons of Nutiva Palm Shortening
- 1/2 cup of millet flour or almond flour
- 1/2 cup of oat flour
- 1/2 cup of gluten free all-purpose flour – I like the King Arthur brand
- 4 tablespoons of ice cold water
- 1 teaspoon of apple cider vinegar to water
- High heat cooking oil to oil your pie dish
Gluten and Dairy Free Pie Crust Directions
Step 1
Measure out 3 tablespoons of sugar, 4 tablespoons of vegan butter, and 3 tablespoons of Nutiva Palm Shortening. The palm shortening is essential for making a flaky crust.Step 2
Combine the sugar, vegan butter, and shortening in a bowl to make a vegan butter cream mixture. Personally, I like to use a fork to blend the ingredients together, but you could also use a pastry cutter.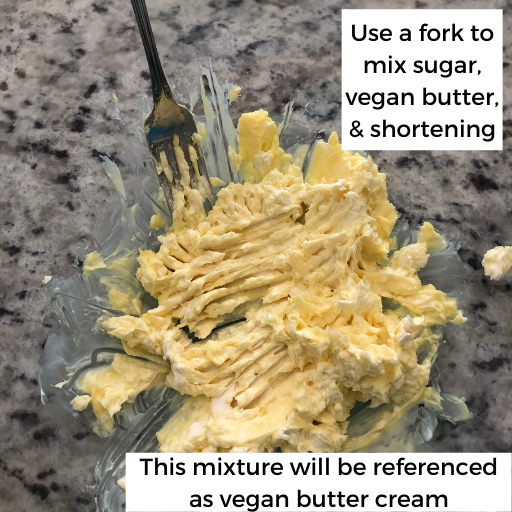
Step 3
If using millet grains, grind the millet in an electric coffee grinder or a Mockmill. Then, measure out 1/2 cup of millet flour. Any leftover flour stores up to one month in a glass jar in the refrigerator. Or, you can put the leftover flour in a ziplock bag, remove the air, label it, and freeze it up to 6 months.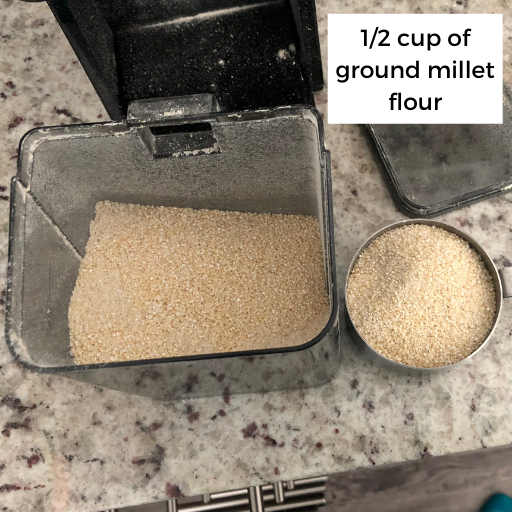
Step 4
Combine a 1/2 cup of millet flour or almond flour; 1/2 cup of oat flour, and 1/2 cup of gluten free all-purpose flour in a bowl.Step 5
Pour the gluten free flour mixture into the vegan butter cream mixture.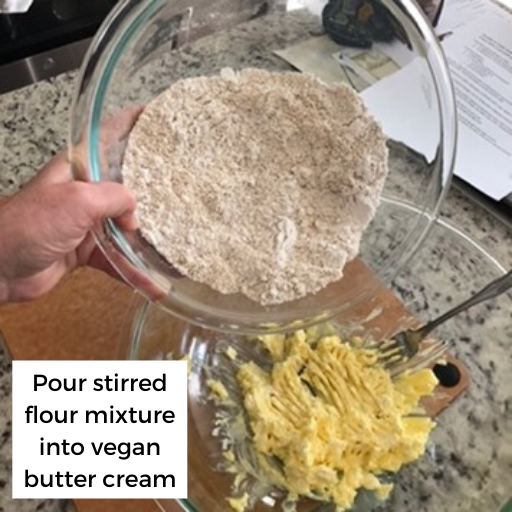
Step 6
Cut the flour into the vegan butter cream mixture using a fork. When you are done with this step, the gluten and dairy free pie crust mixture will have a crumbly texture.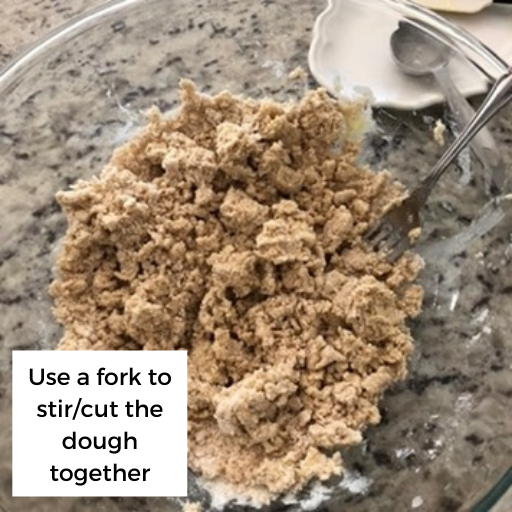
Step 7
Measure out 1 teaspoon of apple cider vinegar and pour it into a small glass cup.
Step 8
In the cup, mix together 1 teaspoon of apple cider vinegar, 4 tablespoons of water, and one ice cube. Then, add one tablespoon of the liquid at a time to the dough. Use a fork to work the liquid into the dough. When you are able to pick up the dough and form a ball, you have added enough liquid.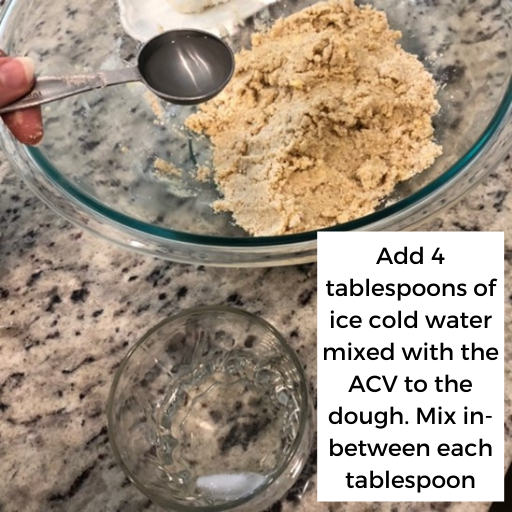
Step 9
Divide the gluten and dairy free pie dough into two balls. This recipe makes 2 pie crusts. Afterwards, place one dough ball on top of a sheet of parchment or wax paper. Then cover the dough with plastic wrap. Use a rolling pin or glass bottle to roll out the dough. If you enjoy a flaky crust, roll the dough until it is very thin. (1/8 inch or thinner)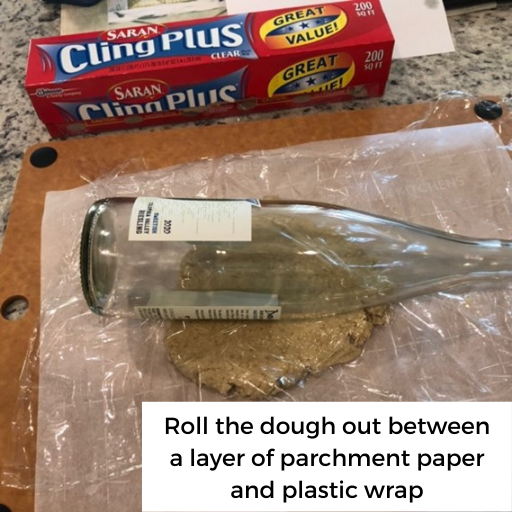
Step 10
Rub high heat cooking oil all over the bottom and sides of your pie pan.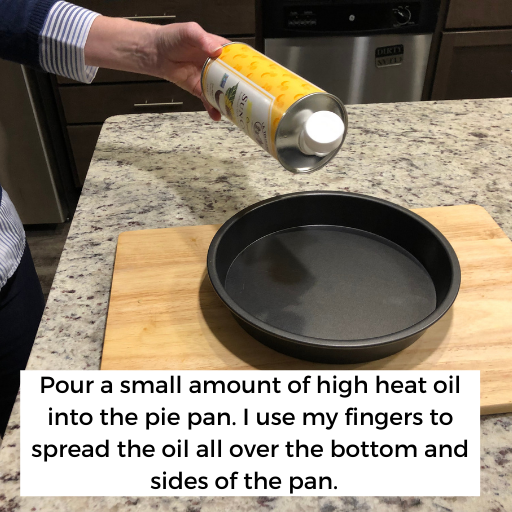
Step 11
Slide your hand under the parchment paper to pick up the pie crust.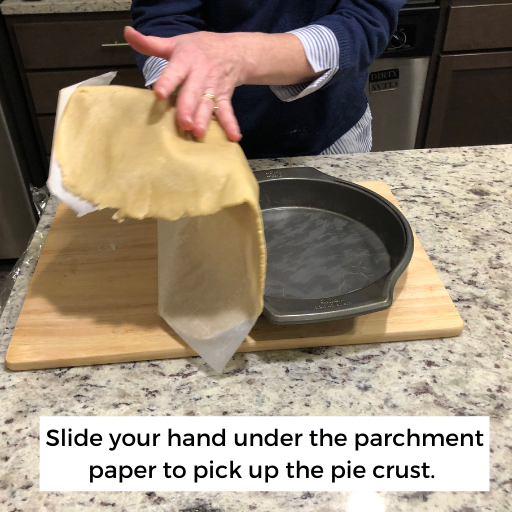
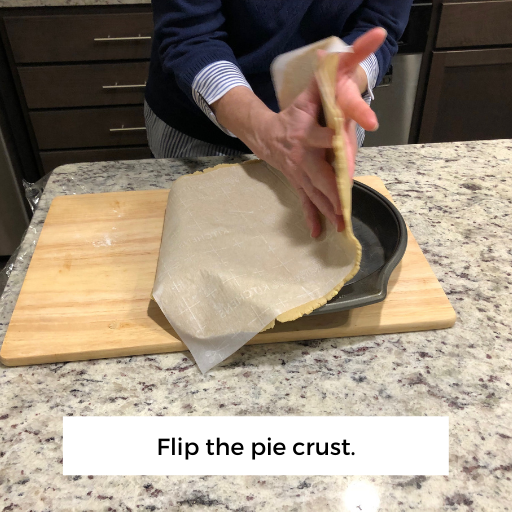
Step 12
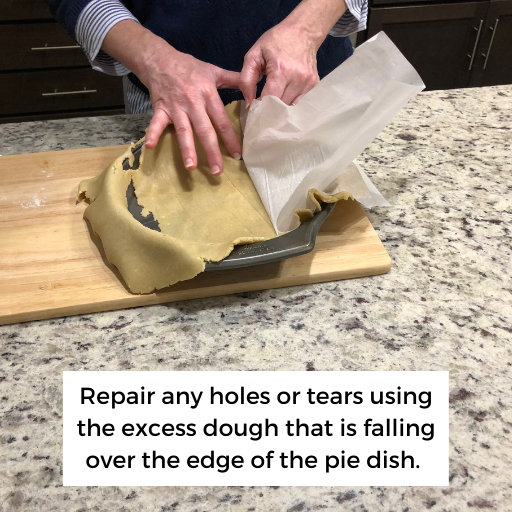
Gently lift up the parchment paper.
Step 13
Use a fork to prick the bottom and sides of the crust to prevent it from bubbling.
Step 14
If you need to pre-bake your pie crust, preheat the oven to 425 degrees. Bake it for 10 to 12 minutes. Check the crust often. Allow it to cool on a wire rack for an hour. Otherwise, simply add your fillings and bake according to your specific pie recipe.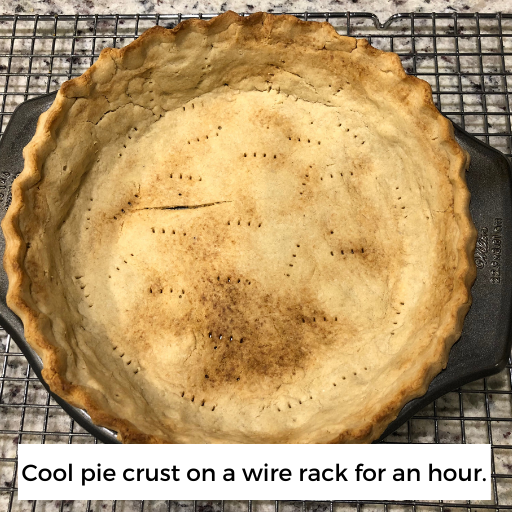
Gluten and Dairy Free Pie Crust Recipe Card
Leave a comment below if you enjoyed this recipe!
This post was originally published elsewhere. Read the original post →
Article by
Cheri Moore
Auditory Integration Training (AIT) and ILS Integrated Listening programs are completed in the comfort of your home with the support of Cheri Moore or a practitioner near you. Cheri's online, interactive questionnaires (preschooler, students, adults) with a free phone consultation helps you obtain a report that communicates concern and learn if you can benefit from Cheri's advocacy services.


Disclosure: Autisable.com participates in affiliate programs, including the Amazon Services LLC Associates Program and other affiliate advertising programs. This means we may earn commissions from qualifying purchases at no additional cost to you.
Comments
Join the community to leave a comment.